Wednesday 19 December 2012

Repairing backgrounds

Repairing backgrounds


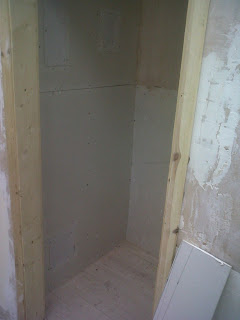
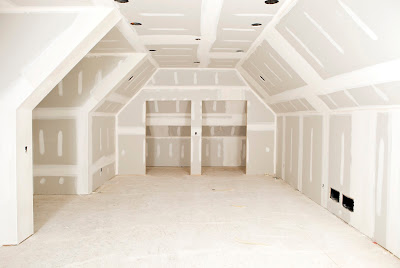
The common defects to backgrounds

·        Indents to walls
·        Crakes from movement to walls
·        Holes to walls


Materials

·        Polyfilla Filler 2kg £15 (1)
·        Plaster board 2400mmx1200mm £10 (1)
·        Scrim 48mmx90mm £5 (1)
·        Dry wall screws 25mm pk 500 £15 (1)
·        Plaster 25kg £10 (1)


The defects and limitations of backgrounds

·        Different type of backgrounds
·        Is its stable
·        If its not overly cracking


Tools

·        Harris Continental Filling Knives 80,100 and 120mm
·        Retractable knife
·        Bin
·        Dust pan and brush
·        Spot bored
·        Tape
·        Pencil
·        Cordless drill 
·        Hark
·        Trowel
·        Plastering bucket
·        Wisk
·        Bucket trowel
·        Level 4 ft
·        Pencil


PPE

·         Boots
·         Gloves
·         Goggles


Risk assessment

·        Cutting hands on objects
·        Tripping over objects
·        Inhaling dust

     
We wear correct PPE. To prevent these risks from happening. To stop cuts to hand wear thick gloves and also keep a good working area so no risk of falling over objects happening and last for dust wear a dust make will help to stop breath in bust and keep your health better. We are working to the health and safety act 1974.


Method statement

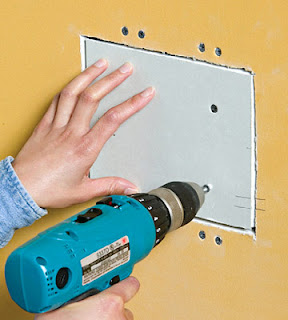
We first got our PPE on, and then we made our way to the area of the hole in wall and marked up a square around hole with a level and pencil. Then protected the floor before cut out with ether a dry wall knife or repeatable knife so that it will give a good fit for a new bit of plaster bored. Then when all fixed and in place with scrim on it and with PVA we started to mix but a bit of later roughly 1m2. After it mixed to a fine and smooth we started to apply it with a 2mm or 3mm 1st cote and then leave till a tacky touch and smooth down. We then reputed the same process but with a thinker cote about 1mm then just do all the same till all polished and nice. Then we made any last touches and packed away (plus clearance).


Quote

Dear customer


We have inspected your wall and found a hole and a few indents too so we shall sort out that for you.

We will cut a good size square, so that we can fit a new bit of plasterboard to your wall to hide the hole and then scrim it so that when we plaster it will look like it was never there.

Then after when all is done sorting out they hole will make a bit of filler up so fill in the indents.

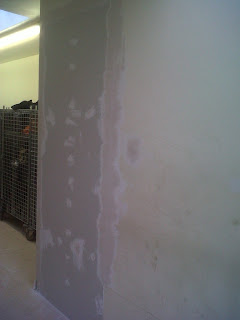
Then we will sand wall down to a smooth finish and then pack away (plus clearances).
 

 Time

6 hours


Cost

They cost of all the materials and labour will be £495


   Materials £55

   Labour £40 per hour

   Overhead (petrol,PPE,permit) £200


Total cost £495


Applying paint


Applying paint


The common defects to paint

·        Bits or dust in paint
·        Running paint
·        Not air tightened enough 


Materials

·        Primer paint 2.5L £20 (1)
·        Interior sage matt paint 2.5L £25 (1)


The defects and limitations of paint

·        Different type of colours
·        Different type of finishes


Tools
·        2 ½ inch paint brush
·        Roller and paint tray
·        Dustsheets
·        Hop up


PPE

·         Boots
·         Gloves
·         Goggles


Risk assessment
     ·        Paint getting in eyes
·        Reaction to paint
·        Inhalation of paint
        

We wear correct PPE. To prevent these risks from happening. To stop paint getting in eye, wear safety goggles all times when using it to apply to wall. Also if you react to paint wear overalls and stop it from skin contact and then wear a dust mask to prevent inhalation of paint. We are working to the health and safety act 1974.


Method statement


We first got our PPE on, and then we made our way to the area of the wall and we started to lay dust sheets so that no paint will get on the carpets or floor. Then ones all is been protected we started applying a primer paint to wall so that we will be able to change the colour more easy and will not let it show the existing colour. We used a 2 ½ inch brush to give a space on the skirting so we can easily run a roller all over with out touching the skirting and we applied 2 cots of the primer and left for a few hours to dry. Then when all is dry we did same process but applied the colour to wall with the same cots as well then after we packed away (plus clearance).  


Quote

Dear customer


We have inspected your wall and we were told you wanted a new colour on the wall.

So we started to put dustsheets down to protect the floor and then got a primer paint to change the colour on wall to a different one with a 2 inch brush then a roller for the middle wall.

After it has dryed off we then got the colour and started applying it to the wall and keeping the area on floor still protected.

Then when it’s all dry again put another cote on and then we waited till all done and then made any last touches and packed away (plus clearance).


 Time

8 hours


Cost

They cost of all the materials and labour will be £565


   Materials £45
 
   Labour £40 per hour

   Overhead (petrol,PPE,permit) £200


Total cost £565


Replacing tiles

Replacing tiles


The common defects to tiles

·        Cracked in the middle of tile
·        Chippings on sides
·        Falling of all as damp behind wall


Materials

·        White Tiles 150mm x 150mm x 8mm £10 (3 boxes)
·        Tile adhesive 25kg £10 (1)
·        Tile spacers 2mm £5 (1 bag)
·        Water


The defects and limitations of tiles

·        Different type of sizes
·        Different type of colours
·        Different type textures


Tools

·        Tile cutter
·        Tile gauge
·        Bin
·        Noted trowel
·        Grout float
·        Sponge
·        Dust pan and brush
·        White bored pen
·        Grout rake
·        Filler knife


PPE

·         Boots
·         Gloves
·         Goggles


Risk assessment

·        Cuts to hand when holding on cut tile side
·        Shards of tile flying in eye when cutting


We wear correct PPE. To prevent these risks from happening. To stop cuts to hand wear thick gloves and keep it from skin if using the cut side, then to stop any shards of tile flying in to eyes wear safety goggles when cutting the tile. We are working to the health and safety act of 1974.


Method statement

We first got our PPE on, and then we made our way to the area were they tiles have fallen off wall because of water getting in throw gaps of tiles and washing the adhesive off making then fall off wall. So we tock all broken tiles away and dryad area and then propend the area were the existing tiles were and then started to apply the adhesive to wall and then fit with tile spacers to give the gap for grouting and also we cut tiles that needed to be cut before we start. Then we have to lave for a good few hours and then grout the gaps to finish. After all then we washed tiles to look nice then packed away (plus clearance).


Quote

Dear customer


We have inspected your tiled wall and you have broken and cracked tiles that need replacing in a few area of wall.

So we shall tack grout out with a grout rake and then push it off with a filler knife and then start to get all stuff together.

Then we prospered the background of wall and then apply adhesive to wall and fit same type tile on with spacers so is has room for the grout to fit.

After adhesive has gone off we shall apply grout and then start to finish up and pack away (plus clearance).
 

 Time

6 hours


Cost

They cost of all the materials and labour will be £485


   Materials £45

   Labour £40 per hour

   Overhead (petrol,PPE,permit) £200


Total cost £485